Tuesday, March 16, 2010

Recipe Mashup: Caramel Coffee Vegan Ice Cream

Ice Cream I don't like to have too many gadgets around my apartment, but sometimes a case can be made if something is going to save me a lot of money. Case in point: ice cream maker. A 2-quart Cuisinart model set me back 60 dollars on Amazon, and it probably won't take long before Jeff and I have eaten that much ice cream and sorbet.

Excited to receive the package a day earlier than I expected, I anticipated scooping beautiful mounds of creamy perfection later that evening. Unfortunately, I quickly learned that although ice cream can be made in roughly half an hour, it takes time to make the "ice cream soup," and even longer to let it cool down enough before churning. Lesson learned! But that wasn't enough to set me back from using my awesome new gadget. I figured I'd just have something sweeter than usual for breakfast.

My first try was Vegan Dad's basic vanilla ice cream, mixing in some chocolate chips (both dark and white chocolate) at the end. But what is even better is the stuff I made last weekend. Looking to recreate the caramel macchiato recipe from The Blooming Platter, I decided to do a sort of mash-up of recipes between that and the aforementioned Vegan Dad vanilla. The results were nothing short of amazing. While the frozen product can tend toward the icy rather than the creamy, waiting 30 seconds or so before eating (if you can exercise that much restraint!) yields a delectably creamy mouth feel, without having to spend big bucks on So Delicious at the store.

Caramel Coffee Ice Cream


Caramel Coffee Vegan Ice Cream
Yield: Approx 1 Quart

3/4 C brown sugar (packed)
2 T vegan margarine
1 T soy milk
2 C soy milk

Heat the brown sugar, margarine, and 1 T soy milk in a saucepan over medium heat until everything melts, whisking continuously. When the consistency gets thick (but not hard), add 2 C soy milk and whisk to combine. Let simmer on low while you do the next step:

1 can full fat coconut milk (cooled so the cream has separated)
Soy milk or creamer
2 T arrowroot or cornstarch
1 T coffee (you can use instant, I didn't)
1 T vanilla extract

Skim the cream off of the top of the coconut milk until you get to the watery stuff left over, and put it into a medium sized mixing bowl. Add enough soy milk or creamer to make 2 cups of liquid. Stir, and also mix in the coffee and vanilla extract.

Take half of this mixture and put it into a small bowl. Add the arrowroot and whisk until it is combined. Pour this into the saucepan with the brown sugar and soy milk, and whisk. Let it bubble and thicken, and the texture should be (as Vegan Dad puts it) glossy. (It's an apt description.) Then add the other bowl of coconut milk / soy milk / coffee / vanilla and whisk until it becomes glossy again.

Pour the (almost) finished product into a bowl, cover, and put it in the fridge until it is thoroughly cold. Then churn it up using your ice cream maker's instructions.

Tuesday, March 9, 2010

Angora Cafe and Super 88: Packard's Corner Vegan Havens

Angora Cafe on Commonwealth Ave at Babcock St is now carrying soy frozen yogurt!

Similar to the Amsterdam Cafe in downtown Boston, they throw a vanilla soy soft serve into a machine, mix in whatever flavors you want (there are 30), and then give it to you. My favorite is green tea. SO good.

The price is pretty steep: $4.50 for about 1/3 of a pint, but it is truly delicious and refreshing if you need soft serve. Sometimes I do. For more bang for your buck, go to the Amsterdam Cafe, where for a similar price you get a full pint of the stuff and a beautiful neighborhood to walk through.

On to Asian supermarket fabulousity!

When we first moved to Lower Allston, we heard from many friends that Super 88 in P.C. was on its way out. Very little food on pallets and shelves, not much to speak of that was vegetarian. It sounded like the most disappointing shopping trip ever.

Lo and behold the Hong Kong Supermarket! It has taken over the Super 88 and restocked the shelves with tons of vegan goodness. Lots of tofu for an incredible price (even the locally made Cambridge tofu), frozen pot stickers and buns with veggie or lotus seed or red bean paste filling, oodles of noodles, aisles and aisles of sauces and dips, including the beloved Sriracha, and of course tons of Asian produce for a good price. Just bring a jacket-it's freezing in there.

Friday, February 26, 2010

It's Vegtopia's One Year Blogiversary!

Today Vegtopia is one year old, and while I certainly wouldn't recommend reading our first post (sorry, it really is that bad) I think it's shaping up to be a nice little blog. While Jeff and I have been buried in work lately, and most of the food we've been making is consumed too quickly to photograph and post online, I have been thinking about future projects that I hope to post. So here's a quick list of what to expect in the future.
  • Pineapple wine
  • Recipes for gravy and hot sauce
  • How to guides to things like making chili
  • A third try at worm composting
  • Growing a veggie garden at my parent's house when the weather is nice again
  • All sorts of jams and jellies
  • Etc....
Thanks to everyone who's been reading our blog!

Sunday, February 14, 2010

Wine Making Update

2010 Cherry Wine Jeff and I just bottled 28 bottles of Chiswick Winery Cherry Wine. It started out a few months ago with two giant 96-oz cans of cherries (which completely stripped my can opener into uselessness), 12-lbs of sugar and some yeast. It is already a very full-bodied wine and I can't wait to try it out as it matures. Hopefully by Valentine's Day next year, it will be a perfect wine to drink to celebrate the holiday.

Jeff and I also engaged in a taste test of our Sauvignon Blanc as it turned four months old on the 11th. We bought a bottle of 2009 120 Sauvignon Blanc from Chile, which was approximately 12$, thinking it might provide a good comparison. I administered the blind taste test to Jeff to ensure that he remained as unbiased as possible. The 120 wine started with a fruity bouquet, and had a luscious, robust taste that lived up to the description on the back of the bottle. Unknowingly, we purchased what is, so far, the best Sav Blanc that either of us has ever tasted, setting the bar really high for our young, home brewed concoction. The Chiswick Winery Sauvignon Blanc had a bouquet that you could tell will mature into something resembling that of the 120 wine, however it did include a couple of off-putting scents, which will hopefully go away in time. The flavor was much more subtle than it was at 2 weeks old, but still has a lot of maturing to do. Jeff was easily able to tell the two wines apart.

At four months old I'd say our Sauvignon Blanc is probably right about where it should be, but probably isn't quite ready to be cracked open for a good drink. For cooking it is superb, and would be perfectly suitable for a wine drinker who doesn't have a terribly picky palate.

2009 Cider Wine That leaves our Cider Wine, which we haven't tasted since bottling it in late November. I think we'll safely leave this, and the Cherry Wine, to age for at least 6 months before drinking. I'm looking forward to how they all turn out, and also looking forward to drinking them, as it's getting increasingly difficult to store so many bottles of wine in our apartment kitchen!

Next up, I think, will be a pineapple wine. We hope to follow that up in the summer with a raspberry wine, and we're also considering buying a 1 gallon carboy to make a few unique wines to test out that we won't necessarily want 30 bottles of. It's been getting much easier making and bottling the wines, now that Jeff and I have made three batches. Our racking skills have greatly improved, and it only takes us one try to get the siphon hose started. The last two wines have had no sediment introduced into the final product. And our families have been doing a wonderful job saving bottles for us, greatly reducing the cost of our hobby. (Did you know that bottles can be the most expensive component per bottle, more expensive even than the ingredients?)

Related Posts:
Vegan Wine Kits
Sauvignon Blanc

Monday, February 1, 2010

Homemade Vegetable Bouillon

Why didn't I think of this before?

I use vegetable stock to make LOTS of dishes--mashed potatoes, curries, sauces and gravies, and obviously soups, but I never thought about making my own stock. Too much time, too much work. Not interested.

But Heidi Swanson at 101 Cookbooks posted a recipe (most annoyingly in ounces and grams instead of cups like a normal American) for a vegetable paste preserved with salt that you simply add to water to make vegetable stock. Awesome!

For this recipe, you will need about 2 lbs of vegetables. My big issue with most vegetable stocks is that they taste heavily of carrots, which just seems cheap to me. I'm going for a richer flavor, with leeks, shallots, celeriac, and dried mushrooms for depth. I used a combination of morels, chanterelles, porcini, and black trumpets.

I have a 7 cup food processor and this recipe was crawling up its walls, so if yours is smaller, half the recipe. Store the finished bouillon in jars in the freezer--it won't harden because of all the salt!

Vegetable Bouillon
makes about 2 pints

Ingredients:
2 large carrots, washed and chopped
2 leeks, washed and sliced
1 shallot, peeled and sliced
1 celeriac bulb, peeled, rinsed, and chopped
2 stalks celery with leaves, washed and chopped
1/3 cup dried mushrooms
2 cloves garlic, peeled
1/4 cup fresh oregano, stems removed
1/4 cup fresh thyme, stems removed
1 cup, plus 2 Tbl salt

1. Add the first four ingredients to your food processor fitted with a metal blade and pulse about 20 times. Add the last ingredients and pulse until your mixture is a smooth paste, patting down the top if it isn't getting to the blades. Blend until the mixture is fully combined, at most 30 seconds.

2. Scoop into jars and keep in the freezer. Add one Tbl per 1 cup of water to make stock, adding more water or bouillon to taste.

Tuesday, January 26, 2010

Mushrooms and Collards in Lemon Pepper Sauce

Alyssa and I were looking through the fridge to figure out what to cook for lunch after our morning run. We rummaged through various cookbooks and food blogs trying to match or modify recipes. After a while with no luck, I decided to wing it. I do admit, however, that this is (very) loosely inspired by the Sausage and Collards recipe from Vegan Brunch, in that it involves collard greens and red pepper flakes. All else besides, this is an original Vegtopia certified recipe. I served this over a small batch of homemade spinach fettucini that Alyssa and I froze a few weeks ago.

Mushrooms and Collards in Lemon Pepper Sauce
Ingredients
6 Mushrooms, sliced
1 Small Onion, chopped
3 Cloves Garlic, minced
3 Stalks Celery, chopped
1 Bunch Collard Greens, chiffonaded
2 Generous Pinches Red Pepper Flakes
1 Tbs. Olive Oil
1/2 C Veggie Broth
1 Tbs. Vegan Margarine
1 Tbs. Lemon Juice
  1. Saute mushrooms, onion, garlic and celery in a pan with the olive oil over medium heat.
  2. Add the red pepper flakes and mix thoroughly.
  3. While these ingredients are sauteing, wash and chiffonade the collard greens.
  4. When the mushrooms look cooked and the onion is translucent, add the collard greens and veggie broth.
  5. Cover and let simmer for ~8 minutes or until the collard greens are tender.
  6. Uncover and add the margarine and lemon juice.
  7. Cook for ~5 minutes on low or until most of the liquid has cooked off.
Serve with a grain of your choice.

Unfortunately, there are no pictures to describe how tasty this recipe was. By the time we realized that this recipe was a hit for the blog, we were already halfway through lunch.

Enjoy!

Sunday, January 24, 2010

New Projects: Pickled Turnips, Cream Soda, Canned Salsa

A few weeks ago I did something depressing, I bought a whole bunch of seeds. Why is it depressing? Because I live in Boston, and it's mid-January. As optimistic as I am that it's only going to get warmer (unless it gets colder first which is only too likely in New England), spring and summer are still months away. I can only daydream about how awesome my garden is going to be.

I also got out a bunch of cookbooks from the local libraries, and they are also making me wish for spring and summer and bountiful amounts of fresh fruits and vegetables. Last summer I made pickles for the first time, and that was pretty much my gateway drug to canning. The quick pickles were delicious, but the canned ones I did and let sit in the cabinet for a few months were nothing short of mouthwatering. Needless to say, I made sure to buy seeds for pickling cucumbers. I want to make buckets of pickles this summer!


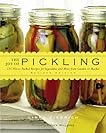
The three books I got are (from left to right) Homemade Root Beer, Soda & Pop by Stephen Cresswell, The Joy of Pickling by Linda Ziedrich and Ball Complete Book of Home Preserving edited by Judi Kingry and Lauren Devine.

Homemade Root Beer, Soda & Pop by Stephen Cresswell
Jeff and I have made ginger ale and root beer, and I really wanted to try out new recipes, so I found this book and decided to give it a try. Last night I made the cream soda (of course, I changed around the ingredients a bit) and it was delicious even before fermentation. We bottled them into glass bottles for the first time, having just purchased a capper from our local homebrew store. I like glass bottles way better than plastic, the only disappointing thing is that the metal caps still have a small piece of plastic on top. It's still a lot less plastic than comes in new plastic caps, though.

Pickled Turnips & Cream Soda I was shocked at how quickly they fermented, this morning the one plastic bottle we filled as a fermentation tester was already rock hard. I don't know if the ale yeast we purchased is just quicker than bread yeast or what, but I was surprised that it was such a fast process. We put all 9 bottles in the fridge and Jeff and I had a taste this afternoon after they were nice and cool. It's definitely unlike any factory made cream soda that you've ever had, and I think brewed soda can be an acquired taste if you're used to Coke, but I thought it was pretty darn good. I like our root beer better, and I'm already thinking of doing some sort of fruit flavored cream soda for better taste.

I'm definitely going to try more of the recipes in this book, and I think, more importantly, that it's a good book to use as a springboard for trying out our own recipes in the future. More than just recipes, the book also includes a history of sodas, the brewing process, and other interesting tidbits.

The Joy of Pickling by Linda Ziedrich
Pickled Turnips Jeff and I have been getting copious amounts of turnips from our produce shipment, and we haven't been particularly good about eating them. In leafing through this book I found a recipe for Korean Pickled Turnips and decided to give it a try. What better way to enjoy anything than to ferment it?! The list of ingredients was short (and all basic stuff we already had) and the process was very simple. I was pleased to see a good amount of brine after rubbing the sliced turnips with salt, and after a few hours put the turnips and other ingredients into a quart sized jar to sit out for awhile. I'll report back in a week or so and comment on whether or not they're any good. For now, they smell fantastic and I can't wait to try it out.

The book has many recipes for pickling pretty much everything, not just the standard cucumber. (But it has many recipes for cucumbers in case your old standard just isn't doing it for you any more.) While I will skip the last chapter on pickling meat, fish and eggs (yuck), I look forward to trying out kimchi and maybe see if we can't pickle some of our other stubborn root vegetables.

Ball Complete Book of Home Preserving edited by Judi Kingry and Lauren Devine
This book is the one that is really making me pine for summer. The first few chapters are all about jams, preserves and fruit spreads. I love nothing more than a good jam on my morning biscuits (especially these decadent Side Hill Farm jams made in Vermont). Hopefully I will have plenty of opportunity to try them out come summer. The only thing is that the recipes mostly all call for pectin, and I would like to try the slow boil method to get more flavor from the fruit. At the very least I think the recipes make for good guidelines, how much sugar to add to how much fruit, etc.

But that's not all that's included in this massive tome. This book also covers pickling, condiments, salsas, pie fillings, sauces, vinegars, and pretty much anything you can put in a can and preserve.

I decided to try the jalapeño salsa because I rarely ever make salsa with our Mexican themed dinners. Why? Because I never want to go out and buy a tomato, but we always have beans, rice, peppers, onions and fixings for tortillas. I finally realized that instead of making fresh salsa before every meal, I can can it and eat it as I need it. What a novel idea! The salsa, miraculously, fit into exactly 6 half-pint jars so I was unable to taste any. Given how much Jeff and I love eating burritos, I'm sure I'll be trying it out real soon.

Wednesday, January 20, 2010

Cool Things - X's to O's Vegan Bakery

I wrote this review on Yelp a few months back, and feel it's worth repeating here on Vegtopia. I spent the first 20+ years of my life in the capital district area of NY, and went to college in Troy. I wasn't vegan until I moved to Boston, but now that I am I know that I can go home to a newly opened vegan bakery on 4th Street. How awesome is that? Become their fan on Facebook and check them out if you live in the area!

---
A vegan bakery in Troy is basically my dream come true. Unfortunately I don't live in Troy anymore so I can only indulge in these delicious desserts when I travel home.

I was so excited to visit X's to O's last Thanksgiving break that I ordered 4 goodies - a cinnamon raisin cookie, maple walnut cupcake, cinnamon roll, and a gluten free pumpkin canoe ("twinkie"). The owner and woman working at the counter were both very friendly, and the owner remembered me from leaving comments on their Facebook page.

The inside of the bakery was very sparse but I am under the impression that they are working on expanding their bakery as they had previously just focused on wholesale orders. I'm excited to see how it evolves over time.

But the important part of my review - how were the pastries? Excellent! Even after sitting in my parent's fridge overnight, they were still amazing. My favorite was the cinnamon bun, it was sweet with just the right amount of cinnamon and the bun itself was a delicious offset to the sweetness. The cupcake was decadent, and if I had a more robust sweet tooth I probably would have loved it even more. Not to say that it wasn't wonderful, it was just on the sweet side. The cookie was amazing, I think the first cinnamon raisin I've eaten since going vegan, and cinnamon raisin is my favorite cookie. The pumpkin canoe was a bit weird, but I got it for my boyfriend as a novelty really. I'd be interested in trying their other canoe flavors in the future.

Will I be going to X's to O's again? YES! Every time I'm back home I will make sure to visit this wonderful bakery. I don't have to lament the fact that I can't enjoy delicious baked goods from Troy (Cookie Factory, previously Vanilla Bean) as X's to O's has stepped up to the plate to ensure that us vegans will never go without a satisfied sweet tooth again.

Tuesday, January 5, 2010

Vegan Wine Kits

As the cherry wine Jeff and I are fermenting nears completion, we are starting to think of what kind of wine to make next. We've done a white (sauvignon blanc) and an apple cider, and this cherry wine will make our non grape wines outnumber our grape wines. I think that we would both like to do a red wine next and see how that goes.

Unfortunately, the wine kits that come with grape juice (such as what we used to make our sav blanc) come with chemicals in the box already. The kits, made by Winexpert (as far as I can tell nobody else makes such a thing) include everything you need to make wine, minus the equipment. I contacted them today to see if their kits are vegetarian, and, alas:
All kits include everything you need to complete the batch - they all have the packages and Isinglass in the box. All the whites contain Isinglass and the reds contain Chitosan.
Isinglass is fish bladder, and chitosan is made of the shells of sea creatures such as shrimp. Why are they necessary in wine making? Quite simply, they aren't. Bentonite and sparkalloids make fine alternatives to isinglass, and for the low-tech vintner, gravity will do the trick. These chemicals are fining agents. They are slightly ionized, which allows sediment in the wine to attach to them. These heavy particles eventually sink to the bottom of the carboy (fermenting tank). When the wine is bottled, you simply stop siphoning it out as soon as you get to the sediment, leading to a very transparent wine, like the kind you get from a "real" winery.

Wineries with high tech equipment can also filter the wine, but that is simply not realistic for Jeff and me.

When the weather is nice again, I may take a trip to the Finger Lakes with my parents to tour the vast wineries in the area. While there I will try to ask if it's possible to buy grapes or grape juice from the wineries. I'm not sure if this is something that's done often but it's what the helpful salesperson at the local homebrew store has suggested. Otherwise, unless Jeff and I start growing our own grapes (not likely), we will be sticking with non-grape fruit wine.

As for other wines, how can you tell if the stuff you drink is vegan? Wineries aren't required to list the chemicals they use on the label (except for sulfites, which are present in every wine as a byproduct of fermentation, and are added as well in most cases as a preservative). But there are a few online guides to help you out.

Saturday, January 2, 2010

Roasted Root Vegetable Soup

I admit it--I went to bed early last night. Eleven, to be exact. I got off work early, but I was still too tired to stay up for midnight.

No matter. It was worth it to be up at 8 this morning and enjoy the quiet morning streets, strewn with snow and metallic confetti. Three pancakes (chocolate-peanut butter-banana pancakes), a soy hot chocolate, and a grocery trip later, Corey and I were home with tons of winter produce. Blood oranges, grapefruit, lemons, parsnips, turnips, and celery root, they are all working their way into this week's meals.

I received a beautiful cookbook from my dad this Christmas called (wait for it): Vegan Recipes by Nicola Graimes. Not the most inspiring title, but it is definitely going to be my favorite cookbook this year. Every recipe has step-by-step color photographs, and the region most prominently portrayed in the book is planet Earth. Morocco, Iran, Japan, Italy, Spain, they are all there, and more. And in the book is, you guessed it, Roasted Root Vegetable Soup.


I'm not using the recipe in the book, I'm just winging it, (this is in the present tense because the vegetables are roasting as we speak) honestly because I didn't think about making soup until I was in the grocery store with celery root and parsnips in my hands. I remembered the beautiful photograph in the book, and, well, I want to go to there.

I'd highly recommend Nicola Graimes' cookbook for new vegans, vegans who are new to cooking, and vegans who have every other vegan cookbook. Again, step-by-step color photographs of every recipe, a wide array of dishes from around the world, and the introduction has extensive health information for new vegans, for vegan parents, and for pregnant vegans.


For the soup, feel free to use lots of different root vegetables. I like the squash because it gives the soup a pretty orange color, and I avoided carrots because the parsnips smelled like carrots (they were under investigation). I've never cooked with turnips or celery root before, so I got one of each to try them out (the celery root, or celeriac, turned out to be a total winner). As for the herbs, I like thyme, but you can roast the vegetables with bay leaves, fresh sage, or rosemary, too.


Roasted Root Vegetable Soup

Ingredients:

1 small butternut squash, seeded, peeled, and 1" cubed
2-3 parsnips, peeled and 1" cubed
1 purple top turnip, washed and 1" cubed
1 celery root, peeled, washed, and 1" cubed
1/4 cup olive oil
2 tsp sugar
salt and pepper to taste
several sprigs of fresh thyme
4 cups Vegetable stock
2 Tbl ground sage
2 Tbl ground cumin or toasted cumin seeds
1 Tbl  toasted coriander seed

1. Preheat the oven to 400 degrees. Toss the cubed vegetables in the olive oil, sugar, salt and pepper, and place them in a deep baking dish in a single layer. Place sprigs of thyme throughout and roast for 45 minutes, turning half way through.

2. Add half of the vegetable stock and half of the roasted vegetables to a food processor fitted with a metal blade, removing the thyme. Add the sage, cumin, and coriander. Puree until smooth. Add the rest of the stock and vegetables and puree, adding more stock if necessary.

Serve very warm with sour supreme and french bread!